BackSeat Driver: Autonomous Vehicle Library for Arduino
Self Driving Robots are Fun.
Today I am introducing the Back Seat Driver — a library for programming autonomous (or not) arduino based robots. Source Code on Github.
This library provides a convenient non-blocking command API to programmatically drive an autonomous vehicle. Current implementation is aimed at a 2-wheeled robot, with the two Servo motors setup opposite each other. Therefore to move the robot forward (or backward), two Servos need to rotate in the opposite direction (this is certainly true in the current version of the library, but may be more flexible in the future if need arises).
[discrete]
Library Features:
- Intuitive and easy to read/use API
- Non-blocking duration-based maneuvers, i.e. “go forward for half a second, then do this…”
- Un-timed moves, such as “go backward” indefinitely
- Turn by angle, computed based on the the wheel ratio coefficient that can be adjusted for each size of tire
- Much more linear speed curve, when mapping from speed in % from 0 to 100, to Servo microseconds. Using
arctan()function allows to flatten out uneven Servo speed response curve (see graph in the PDF for Parallax Arduino Robot Shield Kit).
Design Boundary
Imagine an autonomous robot, driving itself around, sensing and reacting to the environment around it. You can imagine yourself shouting robots command, as you see it approach a table: “Stop, turn left and see if it’s any better”. For any robot to be autonomous this logic must also be implemented in code. But the imagined scenario creates a clear boundary which separates an instructional algorithm that avoids obstacles and determines what the robot does next, from the robot movement library, which simply knows how to spin robot’s wheels to achieve a move or a turn. This project, as you probably guessed, is about the latter part.
Non-Blocking Control
Nowhere in the library is the dreaded delay() function called (this is similar to ANSI/C sleep()), and so the program flow is never paused. . The client of the library is able to provide callback functions to be executed at the end of a given maneuver, such as a turn.
As a trade-off, the client is required to periodically
call +robot->isManeuvering()+ function, to ensure that all callbacks have a chance to
execute and clear, and any maneuvers stopped. If this function is not called frequently enough,
turns can go on for longer and thus be wildly inaccurate. This requires more coordination,
but provides for a lot of options to execute logic while maneuvers are happening.
Neither does the library use any precious Arduino interrupts.
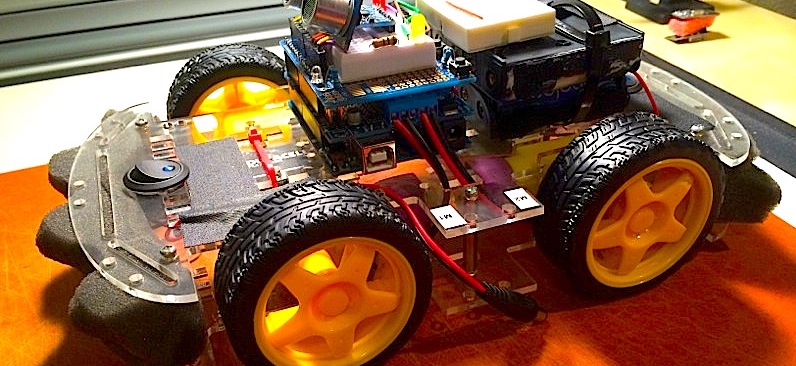
Hardware Requirements
For an example hardware see DIY kit called “Parallax Arduino Robot Shield” available here: http://www.parallax.com/product/323
Any Arduino card with 2 Servo motors attached would work. For most Servo motors that can move the vehicle you would need a decent power supply. The robot above uses 5 x 1.5V AA batteries for a total of 7.5V and about 1Amp. A dedicated motor shield such as Adafruit Motor Shield V2, would be an excellent choice, but there are many others.
Disclaimer and Invitation to Collaborate
This project is also an eternal learning quest for the author, who only started tinkering with Arduino at the end of June 2014. Therefore please keep in mind that this library is not written by an Arduino expert, although the author does have an extensive software development background in other languages.
Any suggestions or modifications are welcome, and will be considered, discussed and decided on in the issues or pull requests.
Usage
Moving Forward, Backward
The speed value passed into the APIs provided by the library are expected to be always positive, and expressed in percent % of the total max speed of the servos.
    // puts motors into 100% speed, forward motion,
    // and immediately return from the function
	robot.goForward(100);
or
   // go backwards @ 50% speed, for 1 second, and then call
   // turnAround() local function (defined elsewhere)
   robot.goBackward (50, 1000, &turnAround);

   ....

   // somewhere else in the code

   // wait for the any maneuvers to finish
   if (!robot.isManeuvering())  { ... }
Speed
Speed is always passed in a positive integer, from 0 to 100 (expressed in %).
Internal helper converts that to Servo’s microseconds PWM timing. In addition we apply arctan()
function to transform speed and provide more linear response between speed and RPMs, compared to
when specifying microseconds directly.
Duration and Callbacks
Duratation based API calls, such as
// load specific Adapter for our motors
#include <BackSeatDriver_TwoServoAdapter.h>

// now load the main library
#include <BackSeatDriver.h>

// initialize the adapter with two pins assigned to
// the two servos
BackSeatDriver_TwoServoAdapter adapter(13, 12);

// initialize BackSeatDriver itself, passing it the driver.
BackSeatDriver robot(&adapter);

// now we can ask our robot to move...
robot.goForward(100); // move forward at 100% speed
is giving robot instructions that will stop the robot after the duration of time passes (defined in milliseconds from the start of the maneuver).
To remain within design goals of the library, the client should aim at not performing any
blocking calls or delays itself, as doing so will make BackSeatDriver inaccurate, and will
prohibit from effectively integrating other similar libraries. In the world where many things
should be moving at once, nothing in the code path seems worthy of a dead pause of the delay,
although for simple tasks it sure makes coding easy.
Example
Self-Driving Robot in less than 100 lines of code…
In this example the client uses Sonar sensor to detect objects ahead. If an object is found, the robot turns left (-)45 degrees, and then immediately checks again for distance. If the distance to the objects ahead is farther than the previous reading, it stays on this route and keeps moving. Otherwise it rotates 90 degrees, to now be at +45 degrees to the original direction. If that direction isn’t better than the front, it turns for additional 135 degrees, making it a full 180’ degrees from the original direction.
This example algorithm is setup in a just a few lines of code using C/C++ style function pointers used as callbacks at the end of each maneuver, but provide for a pretty effective obstacle avoidance strategy (but albeit a random direction).
// Define the two pins used by the two Servos attached to
// the wheels (expected to be attached
// in an opposite direction to each other
// load specific Adapter for our motors
#include <BackSeatDriver_TwoServoAdapter.h>

// now load the main library
#include <BackSeatDriver.h>

// initialize the adapter with two pins assigned to the two servos
BackSeatDriver_TwoServoAdapter adapter(13, 12);

// intialize BackSeatDriver itself, passing it the driver.
BackSeatDriver robot(&adapter);

void setup() {
  robot.attach();
}

void loop() {
  if (!bot.isManeuvering()) {

    // this is the default motion
    bot.goForward(100);

    // check distance to objects ahead
    spaceAhead = detectSpaceAhead();
    // if under < 50cm start manuevering
    if (spaceAhead < 50) {
      // turn left 45 degrees, and when done call
      // the checkLeft() function.
      robot.turn(-45, &checkLeft);
    }
  }
}

void checkLeft() {
  int spaceAfterTurn = spaceAhead();
  if (spaceAfterTurn < spaceAhead)
    bot.turn(90, &checkRight);
}

void checkRight() {
  int spaceAfterTurn = spaceAhead();
  if (spaceAfterTurn < spaceAhead)
    bot.turn(135, NULL);
}
The most critical logic happens inside the loop() method. The checks there do two things:
-
They make sure that any existing maneuvering that may be happening should be finished, and if so stop the robot and execute maneuver’s callbacks()
-
And they avoid doing any instructions until the robot is out of the maneuvering state. This could be optional, as many things can be done during the time robot is maneuvering, perhaps with other arms or sensors.
Working Code
A complete example that was implemented and drove around my house is available in this Github Repository.
The actual logic is in this file.
Comments