Announcing Laser Cutter and MakeABox.IO
The Joys of Laser Cutting are hard to describe…
My day job, @ Wanelo, requires cranking on all cylinders, and so I’ve been pretty busy with life, the universe, and everything, although it mostly means Work, the Wife, and the Cat). In all this constructive chaos, I totally forgot to mention, and properly introduce to the world something I’ve been working on during many sleepless nights this September :)
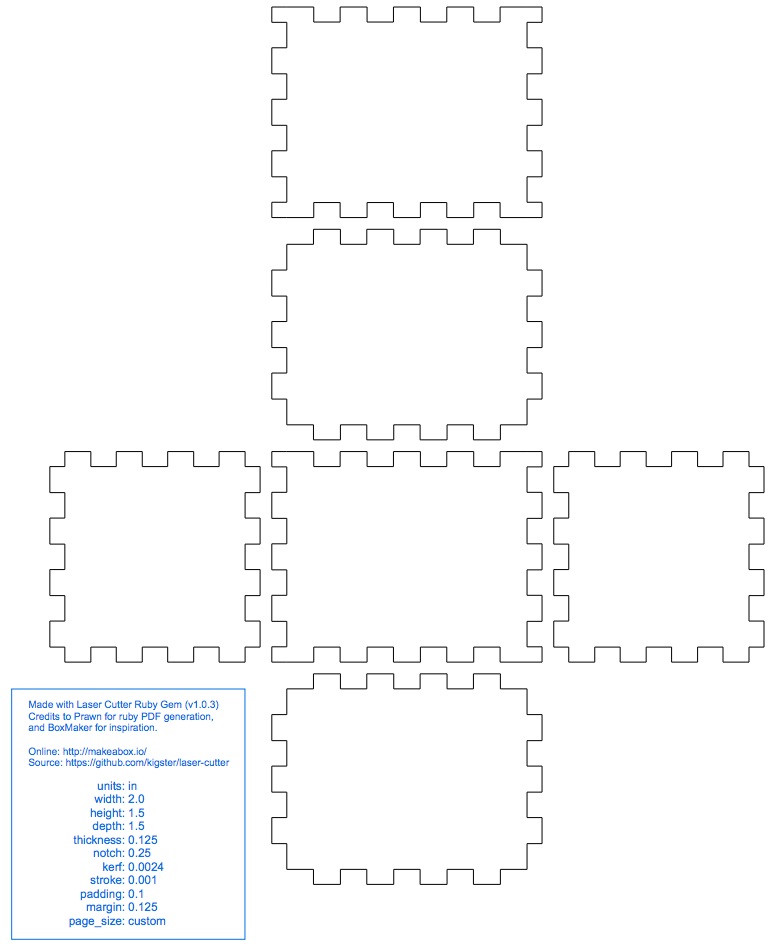
So without further ado, LaserCutter — Ruby Gem (a library and a CLI) for making PDF designs of laser-cut boxes, which fit/snap in together at all edges using tabs that go in and out. The output of the library is a PDF document. Typically next step would import that PDF into Adobe Illustrator for additions and touch ups, and then sent off to a laser cutter for the actual, well, cutting.
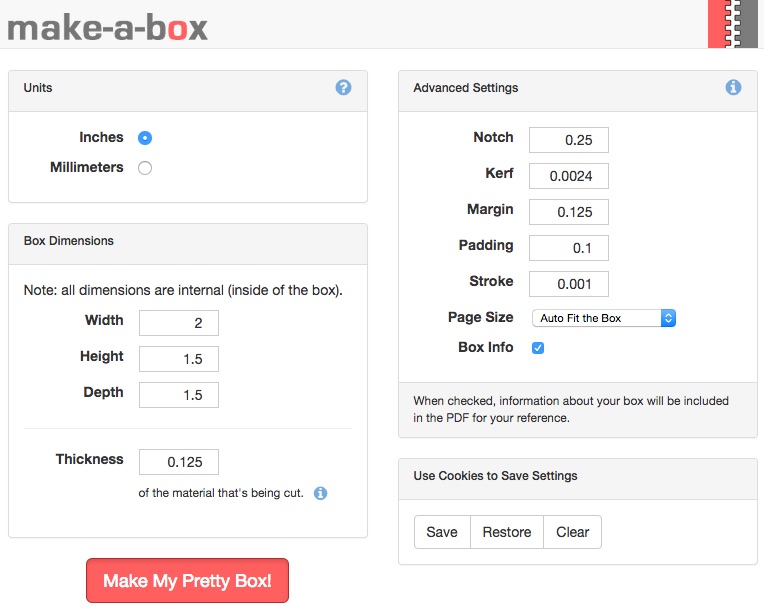
In addition to the ruby gem, there is also simple web front-end, called MakeABox.IO, which can get you started creating boxes without installing any gem, or running anything on the command line.
If you’ve made any enclosures of your own, like either for your electronics gear, or a lighting show, or your cat auto-flushable toilet, you probably used one of the existing and free tools out there. I did not find them all when I started making boxes, but over time the choice seemed to come down to three options:
- Rahulbotics BoxMaker ---- It was working a few months ago, but as of publishing this blog, it’s been taken down, though the source code remains. I used this tool to create about a dozen of my first laser-cut boxes ever, and it worked OK. Note that Adam Phelps has a slightly better fork with easier interface with command line arguments.
- MakerCase — Probably the most advanced online tool I’ve seen, even with visual preview, but I have not actually made any boxes using it. It just wasn’t exciting. It is full of features, but the resulting boxes just didn’t look that awesome, in my opinion.
- Tabbed Box Maker — A plugin for InkScape — I tried this beast on a Mac, and OMG — it takes foreeeeeeeeeeeeever to start and do anything. It also looks… sort of like MS Paint, or something built for Linux GUI a decade ago. I don’t want to hurt anyone’s feelings, but seriously, it took about 2 minutes to start on my iMac that’s about a year old, maxed out build. Srsly?
So, why a new library?
It came down to a simple fact that I was not at all happy with BoxMaker, or the alternatives. Boxmaker had lots of features, but also some bugs; it’s source code was difficult to read and modify, it produced asymmetric box designs ---- including corner pieces that would sometimes be disconnected from the main shape ---- and it had no automated tests. The last part made it difficult to think about contributing fixes.
To top it off it was written in Java, which was the right choice back in 2001.. but we are not there anymore. I think.
So I embarked on writing my own, and as of a few weeks ago, the beast is now feature complete, as far as basic box making is concerned. It’s written in pure ruby with the Prawn library, it has a beautiful command line interface, it’s box cut out designs are handsomly symmetric, and all of my recent boxes have been made using it. And yet, there is so much more that I want to do more with it in the future.
To the coders reading this, I will shamefully admit that the current incarnation of this library (version 1.0.3) contains a number of hacks, and there is a consistent lack of clean intentional software design. I’ve sort of taken a brute force approach in a couple o places, and consequently been awarded a pretty low Code Clime score. (Although who are they to judge! Some computers, dammit :P) But on the bright side, I am planning a refactor before I do more with it. The algorithmic part of this ended up being a bit tricky (surprise!), but the kinks are ironed out and the tests are there to prove it.
Wait, you said “tests”? WTF!
Yes tests. We, in the ruby world, can’t take a shit without writing a test for it. Ruby is a dynamic language and makes test writing both fun and necessary. With tests, someone else can come and contribute to my library, because of the confidence tests provide that they won’t break anything. Well, nearly anything. Not everything is as well tested as it should be, and I’ll slap my own wrists sometime before bed. But some tests are infinitely better than none :)
Tab (aka “notch”) Geometry
One of the key components of laser cut boxes is the tabs that make two sides snap into each other, by using alternative in/out tabs on each side. The width of this tab has a lot to do with the way the box will ultimately look. The default is to use 3 x material thickness, but feel free to experiment with other values. Note that notch width input field is treated as a guideline, and not a promised value.
Kerfing
When laser cuts the material it usually burns a small portion of it. This creates a cut with a non-zero width, called kerf. If your box design does not account for kerf, your box will fit loose. The stronger the laser, the bigger the cut, the looser the fit.
To fix this issue, I added support for kerf. To my surprise it ended up a much more difficult feature than I anticipated. I had to add extra to the tabs sticking out, and I especially was stuck for a while on the corner pieces. Long story short, Kerf is now fully supported, and there is a minimum default kerf value that’s applied to all boxes, unless overridden. I’ve tested it on both acrylic and wood cuts, up to 1/4 inch thick.
Developing Enclosures
My process typically revolves around the following steps:
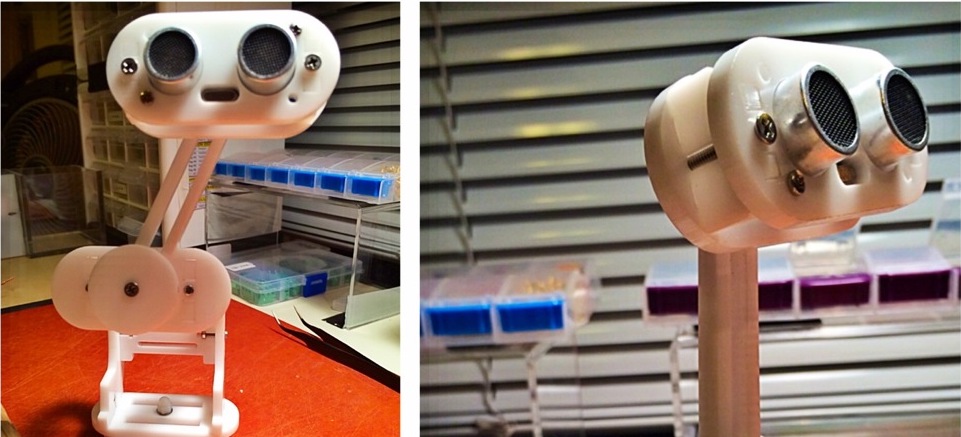
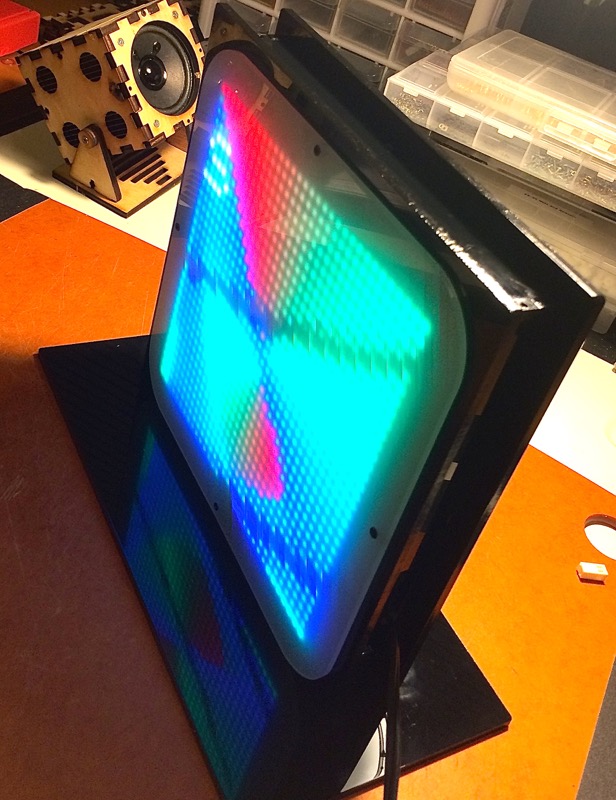
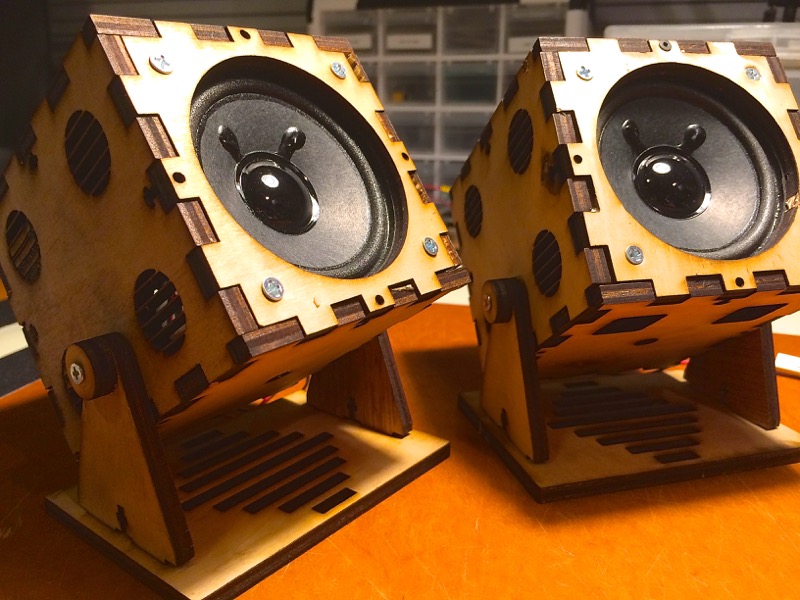
. Measure my components and decide on the internal box dimensions. . Generate the box using http://MakeABox.IO . Import the PDF into Adobe Illustrator . Add holes, joins, openings for switches, screens, knobs, power, etc. . Sometimes I expand a two opposite facing sides to grow larger than the box in both dimensions, so that they end up “squeezing” the contents between them. The picture at the top of the post is using this method: I built this enclosure for the Ada fruit 32x32 LED Matrix powered by SmartMatrix and Teensy 3.1. . Sometimes I make legs and a stand (you can see that on the speakers above — who likes to have speakers that can not aim in your direction? :)
I’ve gotten pretty good at Illustrator, and these days it takes me anything from 10 minutes, to a couple of hours (for a complex project) to design an enclosure. Then of course I haul to Techshop and print it on their Epolog Laser Cutter, while swearing profusely.
Perfect Thickness
Having tried nearly all thicknesses at the thinner range of the imperial scale, such as 1/8, 1/4, 3/16 of an inch, I decided that for plastic 3/16 is really the sweet spot: it does not bend as much as 1/8, but is not as heavy as 1/4.
Command Line
LaserCutter comes with rich command line (CLI) interface, shown to the right.
Notably, --help, --examples is a good place to start.
For example, to create a box defined in inches, set kerf to 0.008” and open PDF in preview right after it is generated, run the following:
 $ gem install laser-cutter
 $ laser-cutter -z 3x2x2/0.125 -k 0.008 -O -o box.pdf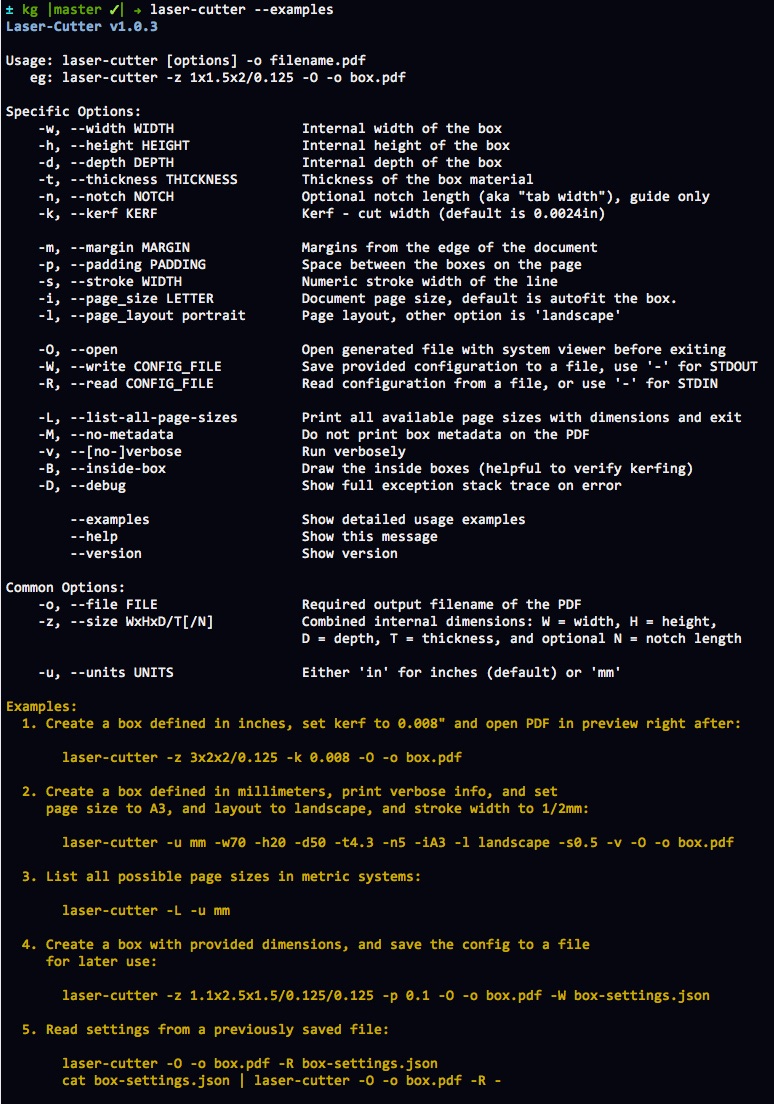
Getting Creative
The image in the very beginning of the post, is supposed to be a pen holder. I started with a box generated on MakeABox.io, and then added circles and other decorations in Illustrator until it looked… well, decorated :)
Next Steps
I am planning on adding a few key features, namely:
- T-Slot joins support with a configurable screw size
- Oversized front/back panel that hide some of the notches (as on the picture above)
- Lids and support for hinges and locks
- Your great idea here? :)
Contributing
My library, like most of the projects I am working on, are under MIT Open Source license. I would love for you to fork it, fix it, add features to it, and submit a pull request! I promise I will consider it in a timely fashion.
Let’s make laser cutting enclosures fun for the whole family! (Or just for you :)
Please leave comments, suggestions, complaints and the answer to life, the universe, and everything.
Comments